So I have an empty blog right now, which also has a not so fancy domain name. Well, let’s blog about how to fix it. Great, this blog is bootstrapping itself! Wait, now you know I host this blog on Azure and that I bought my domain using Google Domains, I hope I am not giving away too many things.
First thing I did when I decided to create this blog was answering the question: what tool can I use to create the blog? I googled blogging tools and I decided I wanted an static site, and the final answer was Jekyll. Then I had to decide how to host it. I had an Azure subscription lying around and it seemed to me I had to create a virtual machine to host it. Sadly or not, there is a much simpler way. Basically, you just have to create an Azure Static Web App and tell it where (in Github) the source for your Jekyll blog is located. It even sets up some form of CI/CD for you. From then on, you just have to push content to your main branch.
Ok, what next? Azure will place your blog on a subdomain, which you can’t choose, of azurestaticapps.net. You probably want to change this for somethingmuchcooler.com (which is available as I write this. Damn! I should have use it instead of my own name). Once you have your domain, you have to configure your Azure app to use it. I will be following these guidelines published by Microsoft themselves.
Delegating domain to Azure
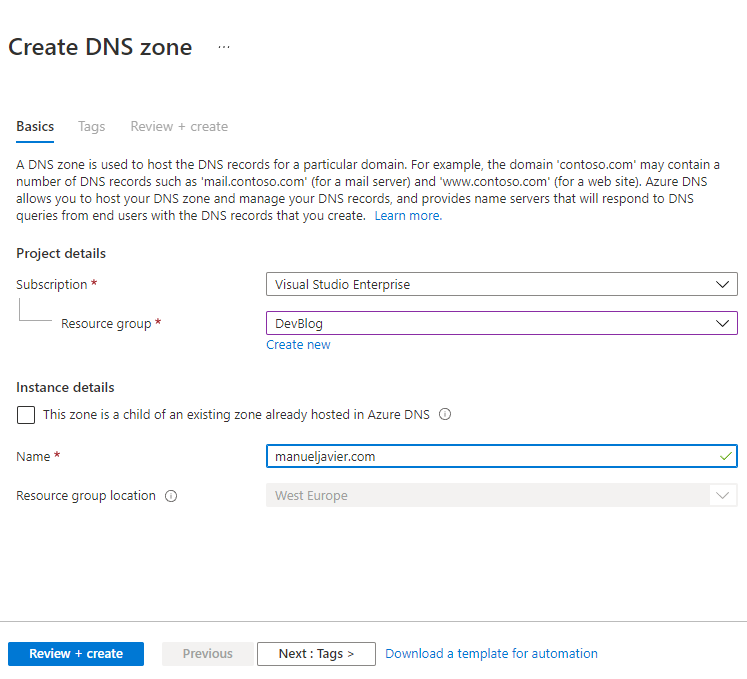
Depending if you will be using a root domain, a sub domain or transfering a domain that is currently in use, the steps to follow are different. For me, I will be using manueljavier.com, so I have to follow the steps for a root domain. The only problem is that Google DNS does not support alias records, which are required if you don’t use Azure DNS. So, before we go any further, we need to delegate the domain to Azure.
First thing you have to do is go to Azure portal and create a DNS zone.
Your Azure DNS zone and your static web app must be in the same subscription.
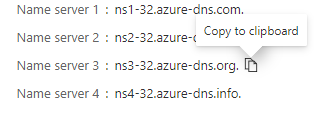
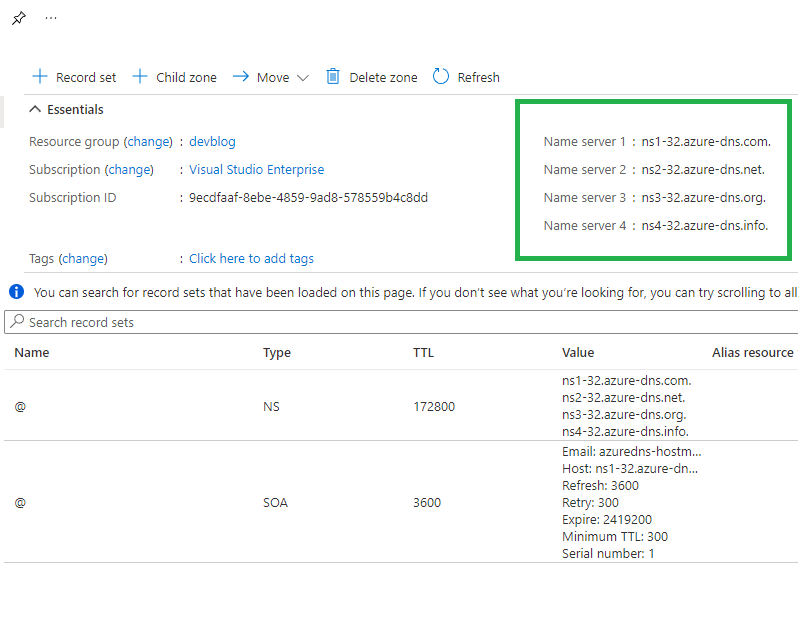
Now, you have to find the name servers for your zone. You will find them easily if you navigate to your newly created DNS zone.
Now you have to go back to Google Domains and set the custom name servers for your domain DNS. Add all the servers that your zone lists.

When introducing the name of the servers on Google Domains, make sure you don’t omit the trailing dot at the end of each address. I recomend using the Azure copy to clipboard button that appears when you over a server address
Once you have introduced all server addresses, save them and click on Switch to these settings to apply the changes. In order to verify everything is working correctly, you can run the next command. Take into account that the changes we have just made might take a while to propagate.
1
nslookup -type=SOA manueljavier.com
The response should look something similar to:
1
2
3
4
5
6
7
8
9
10
11
Server:  250.red-80-58-61.staticip.rima-tde.net
Address:  80.58.61.250

manueljavier.com
        primary name server = ns1-32.azure-dns.com
        responsible mail addr = azuredns-hostmaster.microsoft.com
        serial  = 1
        refresh = 3600 (1 hour)
        retry   = 300 (5 mins)
        expire  = 2419200 (28 days)
        default TTL = 300 (5 mins)
Adding a cutom domain to your static app
Now we can continue start setting up a custom domain to our static web app.
On your Azure panel,navigate to your Static Web App. There, find the Custom domains panel, where you have to hit the add button.
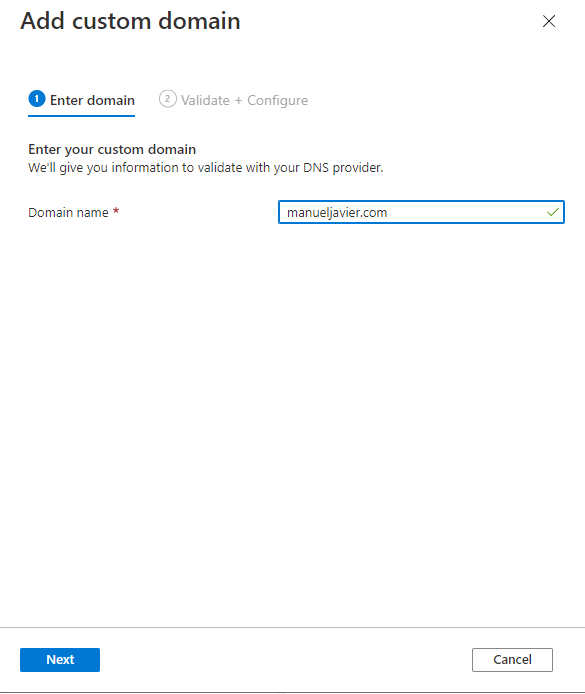
Insert your domain name and hit the next button. On the next panel, you just have to hit the Generate button and wait for the code to be generated.
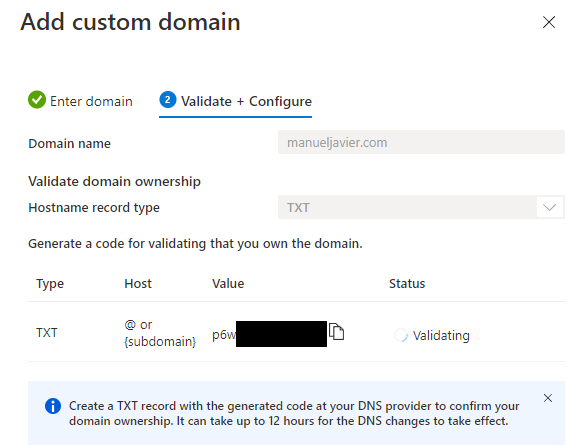
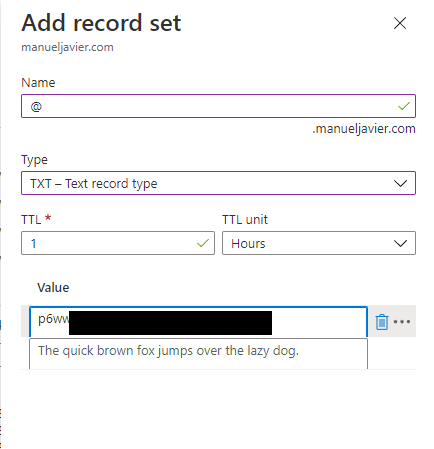
The state of the custom domain will change to validating. It will stay on that state until you confirm ownership of the domain by creating a TXT record on the DNS. To do so, go back to your Azure DNS zone and create the next record set.
| Setting | Value |
|---|---|
| Name | @ |
| Type | TXT |
| TTL | Leave default value |
| TTL Unit | Leave default value |
| Value | The code generated for your custom domain |
After a while -it can take several minutes- the state of your custom domain on the Azure Static Web app should change to Ready.
Creating the alias record
Now, the only thing that is left is adding an alias record on your Azure DNS zone to map your domain to your static app. You achieve this by creating a new record set on your DNS zone with these values. Again, remember that these changes might take a while to propagate.
| Setting | Value |
|---|---|
| Name | @ |
| Type | A |
| Alias Record Set | Yes |
| Alias type | Azure Resource |
| Subscription | Your Azure suscription |
| Azure resource | Your static web app |
| TTL | Leave default value |
| TTL Unit | Leave default value |
.
And that was it. If you have followed through this it means you have now your static web app hosted on your fancy domain. And it also means I have written my first post. More to come!