On this installment of my how to automatize Numerai submissions I am going to talk about how to create a container that runs your submission script. I decided to use Docker on my Windows machine and store the image on the free private repository that Docker offers.
When I started this stage of my little project, all I needed was:
- My sanitized submission script
- My model files well organized on a local directory
- Docker installed on my computer
Script and model files
Sanitizing the submission script is something that I already talked about. However, I think there are somethings that I left out. First, memory consumption. If your script just fits your local machine memory, chances are that you won’t be able to run it on a container on your local machine. This might or might not be an issue, but it is also worth to consider that the more memory your script requires the harder and more expensive it will be to find a cloud infrastructure that supports it. How to reduce the amount of memory that your script uses depends entirely on your code, but in general processing the data in batches can be very helpful. Instead of loading all rows at once, take batches of N rows (1k, 5k, 10k), process them, store the result (in memory or on a file) and repeat. This reduces the memory consumption at the expense of execution time, but there is plenty of time to submit the prediction. Unfortunately, last time I checked it was not possible to process Numerai tournament parquet file in batches, so you have to the csv version instead.
Also: log, log, log. Don’t just print, make logging your best friend.
Finally, I think it is worth having a test mode. This would be a mode where you go through all the motions but don’t upload any prediction. Ideally, this is a mode you can run anytime to test that things are looking good. In my case, this mode forces the script to predict all models, so it also has to download all tournament files. But when the time comes, it skips uploading predictions. This way, when I make changes on the script, I can run it on test mode to make sure everything is ok. It is not nice to wake up one sunday and see that your automatic submission solution has failed and you have to fix it. The goal is to open your home page at Numerai while smelling a cup of just made hot coffee just to check that every model reads On-Time on the submission column :D.
With that out of the way, let’ start building our container image.
requirements.txt
First thing is to create a text file that includes all the depedencies of your python script, so the can be installed on the container. This file should look like:
fastparquet==0.8.0
keras==2.8.0
numerapi==2.9.4
numpy==1.22.2
pandas==1.4.0
tensorflow==2.8.0
You can generate it automatically using pipreqs. Alternatively, you can use pip freeze, but it will output all your installed packages, you will have to trim it down to the packages you actually need. I have done that, is not a lot of work.
The most important thing is to include the version number for each one of your dependencies. One can’t stress this enough. If you don’t do it, things might start breaking randomly depending on the version of the packages you end up using.
dockerfile
As I decided to leave my model files outside my docker image and mount them later, my docker file is very simple.
1
2
3
4
5
6
7
8
9
10
FROM python:3.9

COPY requirements.txt /home/requirements.txt
RUN pip install --no-cache-dir -r /home/requirements.txt

ADD upload_predictions.py .

CMD [ "./upload_predictions.py" ]

ENTRYPOINT [ "python3" ]
It hardly could be any simpler. It just installs the requirements and sets the container to run the python script. This way, the container will finish once the prediction script ends. It’s based on the official python:3.9 image, this creates a somehow big image, around 2.5 GB. I guess you can try to use the alpine version of the python image or build it yourself, but the size of image did not pose a problem to me, so I left it like that.
Building the image and pushing it to the repo
Finally, we just have to build the docker image and push it to a repository. Building the image is very simple, just open a terminal, cd to the directory where your docker file lives and run the next command.
1
docker image build -t mjfgonzalez/mjf_nmr:latest .
where mjfgonzalez would be your docker user name, mjf_nmr is the name you will give to your image and latest is the tag for the image. This will take a few minutes when you first run it, but it will be much faster in subsequent times. When this command finishes, you will have your python script containerized, congratulations! The only problem is that can just access the image from your local computer. This means that you have to upload it to a repository if you want to be able to create a container from anywhere -i.e. the cloud-.
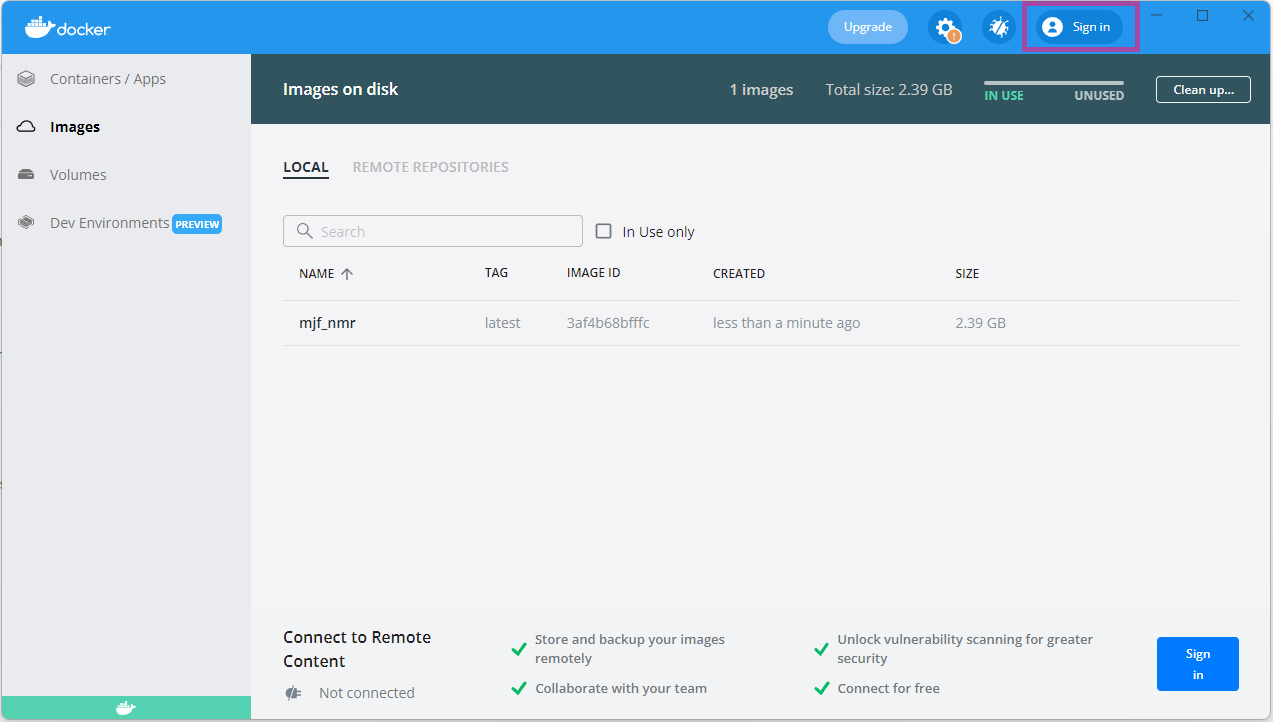
The way you upload the image to the repository might change depending on the tools you use and the repository you choose. I use docker desktop and I will upload the image to the free repository that docker offers. This is how you proceed if you want to go down that road. First, sign in on docker hub through docker desktop. You can find the sign in button on the docker desktop app.
This will open a web browser where you can enter your credentials and on success it will take you back to docker desktop. If you don’t have a repository yet go ahead and create one. I created mine private, event though my container does not have any secrets. However, it is useless to everyone except me, so keeping it private seemed the right thing to do.
Your repository name and your image name must be the same. It was not so obvious to me at first and it gave me a lot of headaches.
Once your have your repository your are just one command away from finishing this part of the tutorial. We just have to upload our image using:
1
docker push mjfgonzalez/mjf_nmr:latest
and you are done. Now on your repository you have your latest image ready to be pulled from anywhere. On the next installment of these series, we will see how to create a container on Azure and schedule it to run every week. See you next time!